-
Leica Store wrote a new post, Leica S2 meets the Leica APO-Telyt-Modular R 400mm f/4 13 years, 2 months ago
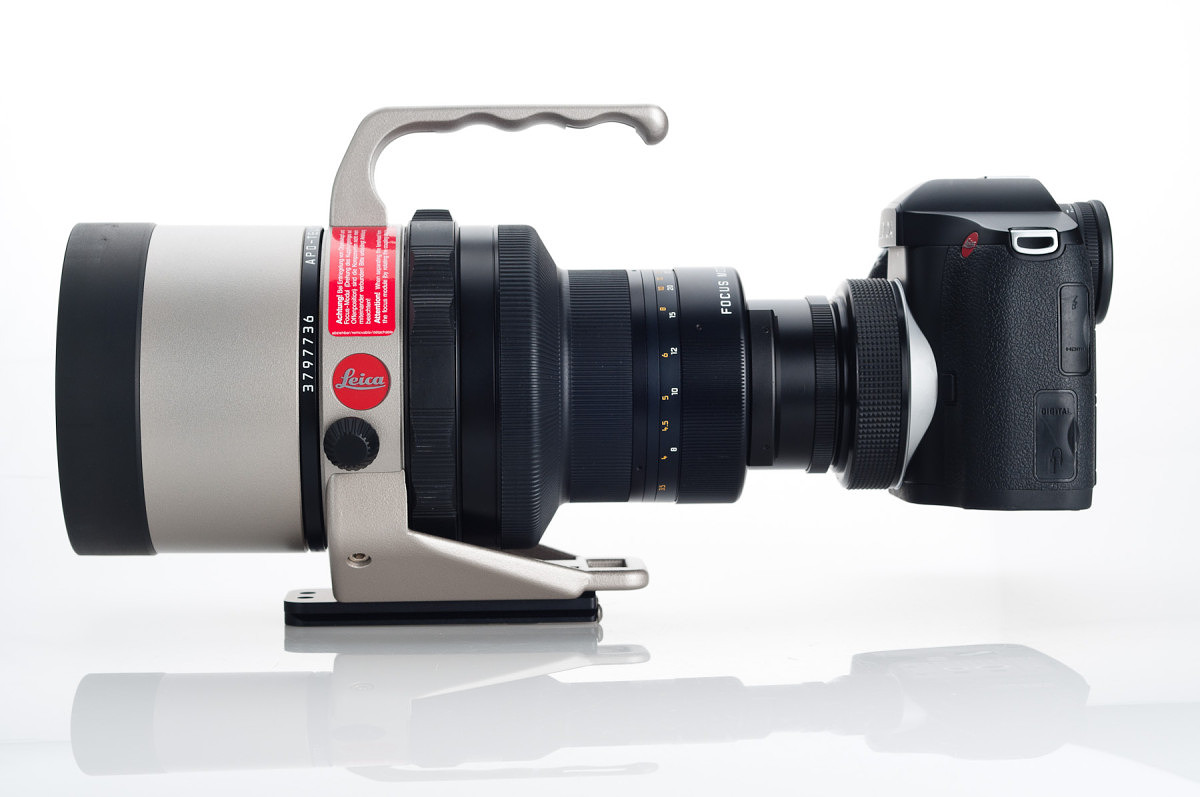
We figured we'd take a Leica APO-Telyt-Modular R 400mm f/4 and modify it for use on the Leica S2. Yes, it works! Yes, it's sweet!
Check back soon for the results of our in-depth testing and lots of sample images. We're going to have fun with this one.
Update: started a discussion thread in the forum and uploaded an image or two from yesterday's test shootingLeica S2 meets the Leica APO-Telyt-Modular-R 400mm f/4!
-
Leica Store wrote a new post, First Look at the Leica S2 Microprism Focusing Screen 13 years, 2 months ago
At long last, we have finally received a Leica S-Camera Microprism Focusing Screen to evaluate, and it did not disappoint.
All Leica S2 bodies have come from the factory with the Universal Focusing Screen. While ideal for general use, the standard focusing screen sometimes left users who prefer manual focus wanting more. Leica later released the S-Camera Screen with Grid, which aided those with compositional perfection in mind. Soon, Leica will start shipping the last piece of the puzzle, the Leica S-Camera Microprism Focusing Screen.
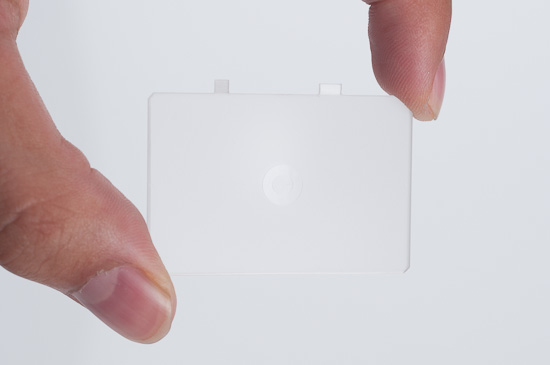
Also known as a split-image focusing screen, it maintains full auto focus while allowing for extremely precise manual focus control. This is especially beneficial for those using alternative, manual-focus-only lenses with adapters on the S2. During the course of our testing, we observed that the microprism screen is actually brighter than the standard (and already extremely bright) Universal Screen.
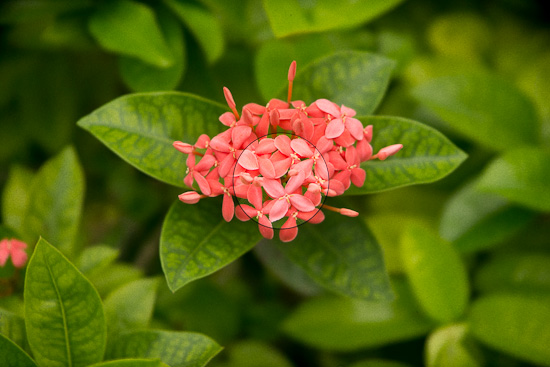
The Leica S-Camera Microprism Screen, when the image is in focus. Click for larger view.
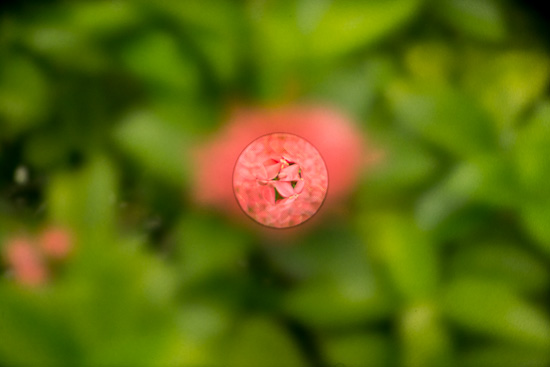
The Leica S-Camera Microprism Screen, when the image is out of focus. Click for larger view.
The area around the central prism transitions from semi-translucent to perfectly clear once the subject is in focus; the central prism itself is bright enough to allow manual focusing even when an alternative-mount lens is stopped down to f/11.This video demonstrates manual focusing with the Microprism Screen through the viewfinder of the Leica S2, shot with a Leica D-Lux 5:
Dale Photo & Digital is currently taking preorders for the Leica S2 Microprism Focusing Screen.
-
Leica Store wrote a new post, Adobe Lightroom 3.5 RC available for download 13 years, 3 months ago
-
Leica Store wrote a new post, Testing the Pentax 105mm f/2.4 vs. the Leica 120mm f/2.5 APO on the Leica S2 13 years, 3 months ago
We’ve been experimenting with alternative lenses on the Leica S2 for the better part of a year now, trying to see which lenses perform best and offer an S2 user some kind of additional functionality or creative possibilities. Some basic lenses, like the Hasselblad 80mm f/2.8 CF, have no real benefit as the Leica 70mm Summarit-S ASPH offers a faster maximum aperture, weather sealing, autofocus and superior image quality in just about every measure. Then, we have specialty lenses. These are the ones that interest me – ones that offer something different. A lens we’ve been wanting to test for some time is the SMC Pentax 105mm f/2.4. The lens is generally well-regarded among Pentax 67 users, especially for shallow depth-of-field portraiture. After getting my hands on one, I figured a test was in order and put it head to head against the outstanding Leica 120mm f/2.5 APO-Macro-Summarit-S.
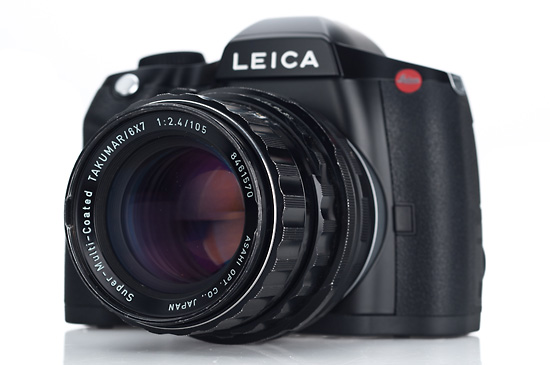
How does the Pentax 67 105mm f/2.4 stack up against Leica’s 120mm f/2.5 on the S2? Setting aside that the Leica is a macro lens and the Pentax is not, both offer a similar focal length and almost the same maximum aperture (within a 1/10th of a stop). Instead of breaking out the test charts, I decided to give the lenses a head-to-head test on the streets of Old Fort Lauderdale.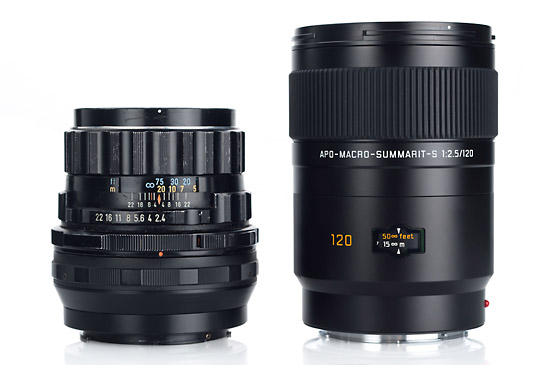
Pentax 105 (with P67 to S adapter) and Leica 120 side-by-side
Almost any decent lens can perform well at f/8-f/11, so I was really curious to see how these two fast-aperture short teles would measure up when shot wide-open. I figure if you're going to go with a fast lens, you're going to want to use it to reap low-light advantages and/or use the shallow DOF for creative use.

Leica S2 with Pentax 105mm 1/4000th @ f/2.4, ISO 320 100% crop
Testing
I didn't use a tripod or cable release when shooting these tests. I also didn't move closer to the subject with the 105mm to match the framing of the 120mm. My technique was simple: wander around looking for photos, take a shot, then without moving my feet, change lenses and shoot the same basic picture at the same aperture setting (letting the camera’s meter determine shutter speed) and try to select the same focal point. I used autofocus for the 120 and manual focus for 105. My goal wasn't to shoot under perfect, ideal conditions. Rather, I wanted to see how each would work in an actual shooting scenario. Now, these happened to be pretty easy conditions – good weather, plenty of sunlight, no deadline, no pressure. Just a nice Sunday stroll around Old Fort Lauderdale with non-moving subjects.
On the processing side, all images were converted in Adobe Lightroom 3.4.1 using my standard S2 preset. For each pair of shots, the same white balance, tone curve and sharpness settings were used. The only difference was some minor exposure adjustment to better match the two shots to each other and eliminate minor metering differences.
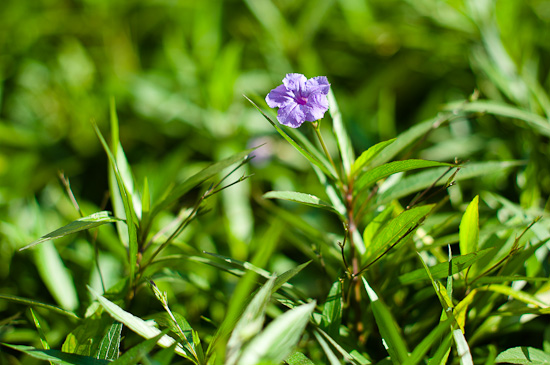
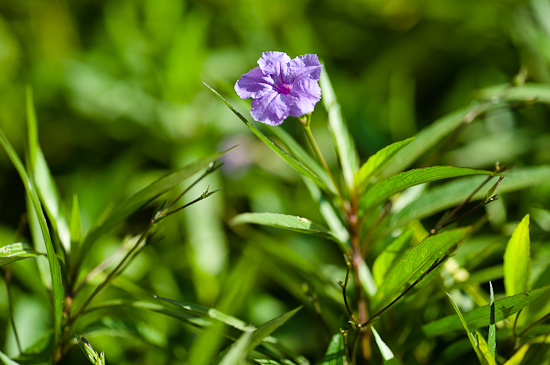
This first pair of flower shots is just to show the overall feel of the different lenses at close focus. The Pentax was right up against minimum focus distance, while the Leica, of course, still had more room to go being a macro lens. Both were shot from roughly the same distance, and the greater magnification of the 120 is pretty clear. Note the color difference as well. The same white balance was used for both shots, so the difference is in the lens.
Below is another shot just to get a feel for image rendering and focus transitions. The Pentax has a pleasing bokeh, but the greater contrast and sharpness of the Leica makes the foreground snap more.
I ran across what I am assuming is a replica Shelby Cobra parked in a small off-street lot and figured this could be a good opportunity to examine how these two lenses handled chrome, which is notorious for revealing chromatic aberration (CA). As you can see, the Leica performs up to its APO namesake with virtually no CA. The Pentax is obviously not corrected for CA and shows quite a lot, with shifts from red/purple to green. As much as I tried to eliminate the aberration in Lightroom, the CA was never completed eliminated.

Leica S2 with Pentax 105mm 1/3000th @ f/2.4, ISO 320 100% crop

Leica S2 with Leica 120mm 1/3000th @ f/2.5, ISO 320 100% crop
In the interior of the car, the chrome-trimmed gauges and steering wheel are typically very prone to CA errors. Check out the 100% crop of the Leica shot for how chrome should look. Unfortunately, on this sequence, I didn't get the exact same shot for direct comparison, but the differences between the lenses are very obvious.

Leica S2 with Pentax 105mm 1/750th @ f/2.4, ISO 320 100% crop

Leica S2 with Leica 120mm 1/1500th @ f/2.5, ISO 320 100% crop
Across the street from the car was a wooden gate in open shade. The chain made for a nice, detailed target. Not only is the chain a bit soft in the resulting Pentax image, but in this diffuse lighting the overall contrast of the image is extremely low – whites are muted and darks are washed out.

Leica S2 with Pentax 105mm 1/1500th @ f/2.4, ISO 320 100% crop

Leica S2 with Leica 120mm 1/1500th @ f/2.5, ISO 320 100% crop
The color of the images produced by the Pentax 105 are much cooler than those of the Leica 120, losing some of the natural warm tones from some of the subjects and the feeling of afternoon light. You can see this on the following image of the palm tree trunk. On the plus side, the drawing of the lens is pleasing with very smooth bokeh and nice tonal transitions, although hard edges sometimes surround bright out of focus elements.

Leica S2 with Pentax 105mm 1/500th @ f/2.4, ISO 320 100% crop

Leica S2 with Leica 120mm 1/500th @ f/2.5, ISO 320 100% crop
This next series of shots show relative performance at infinity. To level the playing field, I shot both at f/8. As an added bonus, you can see how the Leica 120 performed at infinity wide-open verses the Pentax 105 at f/8. It's really impressive. One the things to note is the moire on the building's air vents. The Pentax shows considerable moire while the Leica shows almost none, which can be attributed to the Leica's superior resolving power and color correction, as well as its slightly greater magnification.
Leica S2 with Pentax 105mm 1/500th @ f/8, ISO 320 100% crop

Leica S2 with Leica 120mm 1/500th @ f/8, ISO 320 100% crop Just for grins: Leica 120mm @ f/2.5- 100% crop
Moving closer for middle distances, this railroad track provided some excellent details as well as showing the difference in color rendering again. These were shot towards the end of the day and the Leica lens accurately shows the warm coloration of the light. Look at the bright wall behind the tracks on the left side of the frame.
Leica S2 with Pentax 105mm 1/2000th @ f/2.4, ISO 320 100% crop

Leica S2 with Leica 120mm 1/3000th @ f/2.5, ISO 320 100% crop
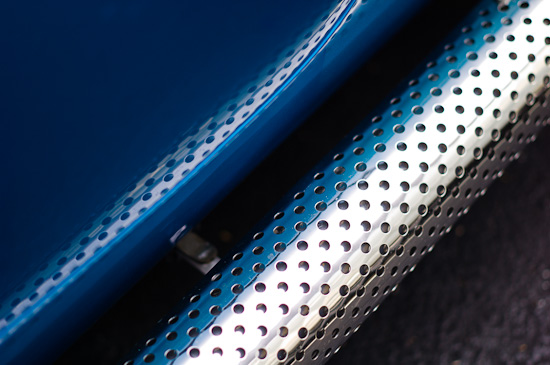
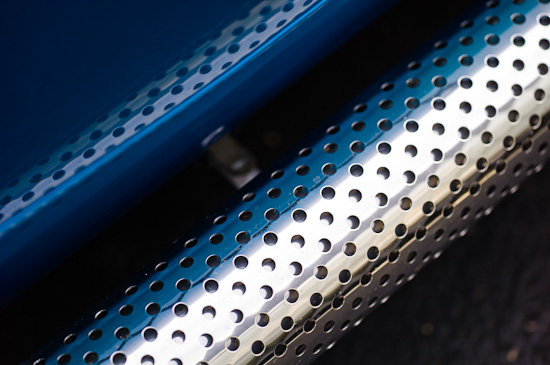
In lieu of a brick wall, I went for the brightly colored wooden wall with a purple pipe. If you check out the crops of the pipe from the center of the image, the Pentax at f/5.6 still is not anywhere as sharp as the Leica is wide-open at f/2.5.
Leica S2 with Pentax 105mm 1/2000th @ f/2.4, ISO 320 P105 @ f/2.4 – 100% crop P105 @ f/5.6 – 100% crop

Leica S2 with Leica 120mm 1/1000th @ f/2.5, ISO 320 Leica 120mm @ f/2.5 – 100% crop Leica 120mm @ f/5.6 – 100% crop
The Verdict
Admittedly, this wasn't a fair fight. It’s like comparing a birthday party pony past his prime versus a thoroughbred race horse on the same track. The differences become very obvious very quickly. As such, I think the results were predictable even before I shot a single frame. The Leica 120mm S is just a spectacular piece of optical engineering. No one has ever made an f/2.5 max aperture 120mm macro lens for medium format before, especially one that can resolve 40 lp/m at more than 80% contrast wide-open and performs as well at close range as it does at infinity. This is truly one of the best lenses Leica has ever produced. So, the deck was already stacked in the Leica lens' favor.

Leica S2 with Pentax 105mm 1/4000th @ f/2.4, ISO 160 100% crop – center | 100% crop – edge
The SMC Pentax 105 f/2.4 performed okay. For those wanting a fast portrait-length lens for the S2, it certainly does a decent job. At f/8 it is actually quite sharp. Wide-open, especially when compared to the Leica, the Pentax lens is pretty soft, with noticeably less sharpness and contrast. There is a good deal of CA which is not really correctable in software. Focusing on the S2 is easy and physically, the 105 is compact and light.
One of the nice things about these older alternative lenses is that they are very inexpensive and have already been fully depreciated. If you buy a P67 105 for $500 and use it for six months while saving up for the 120 S, you can probably sell it for the same $500, essentially getting free use for that time and not tying up very much money.
Alternative lenses like the P67 105 serve an important purpose (no, not showing how awesome the S lenses are). Not all S users will want or be able to justify having all the S lenses. A three lens kit like a 35, 70, 180 could be very well served by adding the P67 105 for the creative options it could add, and for the cost, it might be worth a try.
I created a new discussion thread on the forum for comments and feedback: Testing the Pentax 105mm f/2.4 vs. the Leica 120mm f/2.5 APO -
Leica Store wrote a new post, Leica M9 Upgrade Program 13 years, 3 months ago
Today, Leica is announcing their new M9 Upgrade Program. Similar to the upgrade program for the M8 when the M8.2 was released, current M9 owners will be able to add features only found on the new M9-P, like a […] -
Leica Store wrote a new post, Maximizing High ISO Performance on the Leica S2 13 years, 4 months ago
Traditionally, medium format photography involves sturdy tripods, long shutter speeds, and low ISO settings. I imagine that many Leica S2 owners have never even tried to shoot above the camera’s base ISO setting of 160. In reality, the S2’s versatile ISO capabilities open up new possibilities for hand-held medium format shooting. With an ISO range of Pull 80 all the way to 1250, the S2 inches far closer to the coveted hand-held usability of 35mm DSLR cameras than medium format ever has in the past, while still maintaining the full 37.5 megapixel resolution of the CCD sensor.
At its base setting of ISO160, the S2 exhibits an excellent balance of noise, sharpness, and shadow detail. This image was shot with the Leica S2 and 180mm lens, ISO160, f/11 at 1/180 of a second. The purple area in the center of the statue serves as an excellent area to gauge noise in this image (the faded yellow area is from the statue's exposure to the hot Florida sun).
Applied to this image is a Lightroom preset with a combination of settings that maximize detail. You can download this ISO160 S2 preset here (right click and save to download preset).
Bumping up the ISO to 320 shows a negligible increase in noise while still retaining the fine detail in this image. I adjusted my exposure by exactly 1 stop, my new settings are ISO320, f/11 at 1/350 of a second. You can use the same ISO160 preset on this ISO320 image, but for images with large areas of single tone such as skies or man-made objects, I tend to use a preset with a small amount of luminance noise reduction and a bit less sharpening, which you can find here (right click and save to download preset).
When shooting the S2 hand held, even outdoors, I am almost always at ISO320. This way I can keep my shutter speed up but also extract as much detail out of every scene.
Raising the ISO yet again to 640 requires a slight change in technique if I want to minimize the encroaching noise. Increasing my shutter speed again by 1 stop, the settings for this image are ISO640, f/11, 1/750 of a second. You can see that there is a reduction in fine detail, but noise is still well under control. Using ISO640 requires a different Lightroom preset, which you can find here (right click and save to download preset). This preset reduces the amount of sharpening and adds a small amount of luminance and color noise reduction.
Still not impressed? Now I will increase the ISO to the S2’s highest setting, ISO1250. Again I will bump up my shutter speed one stop, so my new settings are ISO1250, f/11, 1/1500 of a second. This is where noise will be most obvious, and fine detail will degrade further.You might ask why bother shooting at ISO1250? With a bit of technique you can actually extract considerably more quality from the S2 at ISO1250. The secret is a bit of overexposure. By slowing my shutter speed down just 1/2 of a stop to 1/1000 of a second at ISO1250, the improvement in overall image quality is significant. Not only does noise decrease dramatically for such an incremental change, the overall color is dramatically improved. Essentially you are shooting at ISO800. With the right preset, found here (right click and save to download preset)you will be surprised at how well the S2 performs at the absolute limit, previously territory reserved only for 35mm digital SLR cameras.
I can recall a meeting with a professional photographer and his first assistant where they requested to see some high ISO images from the S2. Showing them the ISO1250 shot overexposed by 1/2, they insisted on seeing the metadata of the image to PROVE that it was really shot at ISO1250, since they could not believe such performance could come out of a medium format CCD.
The next time you work with the Leica S2, I would definitely suggest trying some shots at all of the S2’s ISO settings. Be aware that the preview on the S2’s rear LCD screen will exhibit more noise due to the rendered JPEG preview than the actual file with contain. If you are regularly shooting with an S2, keep in mind a few important factors:
- There is little difference between ISO160 and ISO320, so when shooting hand held in normal lighting conditions, it’s always a good idea to shoot at ISO320 to keep shutter speeds up
- The right Adobe Lightroom preset can make all the difference
- At higher ISO settings, a slight overexposure of 1/2 a stop can dramatically reduce noise
- While it might be tempting to always shoot at the lowest ISO you can, remember a bit of noise in your image can be corrected, but a blurry image from a slow shutter speed cannot.
You can download a ZIP file with all four Lightroom presets here:
Leica_S2_Lightroom_3_4_1_Presets.zip
You can also download the DNG files of the images used in this article here:
S2_ISO160.dng
S2_ISO320.dng
S2_ISO640.dng
S2_ISO1250_overexp.dng (Overexposed 1/2 Stop)
S2_ISO1250.dng
I've started a discussion thread in the forum for any feedback, questions or suggestions: -
Leica Store wrote a new post, Testing the Leica S2 and Hasselblad 350mm F/5.6 Superachromat 13 years, 4 months ago
As of the summer of 2011, there isn't a Leica S mount telephoto lens longer than the Leica APO-Elmar-S 180mm f/3.5. Through the use of lens adapters, the gaps in the Leica lens lineup can be filled. In this case, I was able to test the venerable Hasselblad 350mm F/5.6 Superachromat on the Leica S2 using one of Dale Photo & Digital’s S2-V lens adapters .
I grabbed the S2, 350mm lens, and a Gitzo 3541XLS tripod and headed down to the beach around 9:30pm. I happen to live in condo country, so finding subject matter was easy. It took some practice to achieve correct focus, but thankfully the lens can be adjusted very precisely. Combined with the extremely bright viewfinder of the S2, focusing on the distant building was easier than I anticipated. Using the Leica S2 remote release, I fired off a few 32 second exposures at f/8.0.
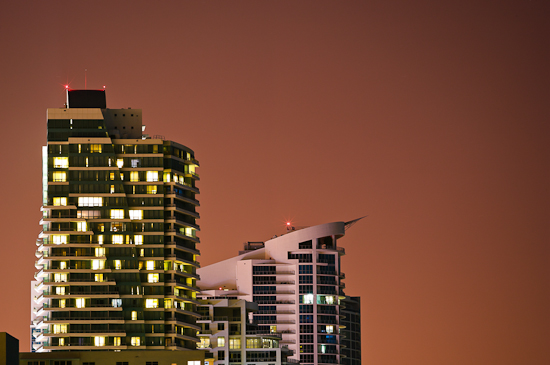
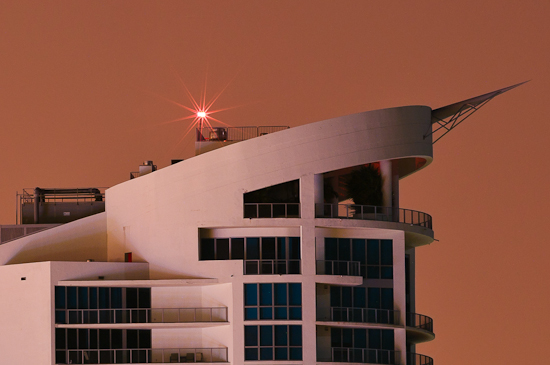
100% Crop
After heading back upstairs, I pointed the lens westward and photographed a bit of the skyline of lovely Hallandale, Florida. The lens actually renders quite nicely, living up to its legend on a camera that Hasselblad's optics designers could never have imagined their lens attached to. On the S2, the Hasselblad 350mm Superachromat is a potent combination.
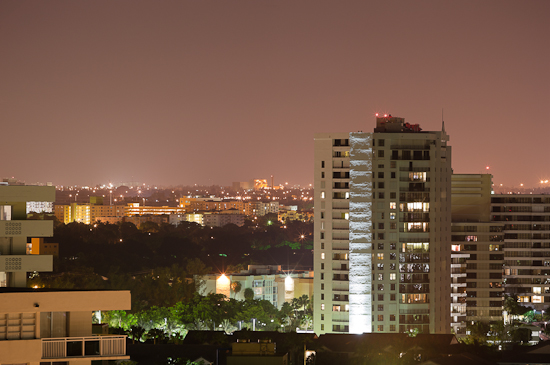
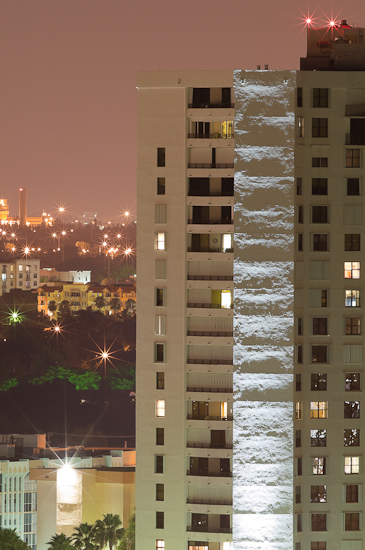
100% Crop
The lens is quite addicting to use. The following day, I pointed the lens down towards the beach, from about 200 feet up, to see how well it could really perform in ideal conditions. Needless to say I was again blown away by the quality of this lens at f/11 in bright sunlight. I will say it is almost impossible to hand hold this lens, due to the extreme fine tuning needed to get the perfect focus with so little depth of field. If you have a LOT of light and are able to keep your shutter speed above 1/800 at f/11 or more, I think it could be doable. Otherwise, a sturdy tripod and cable release are necessary to get the most out of this lens.
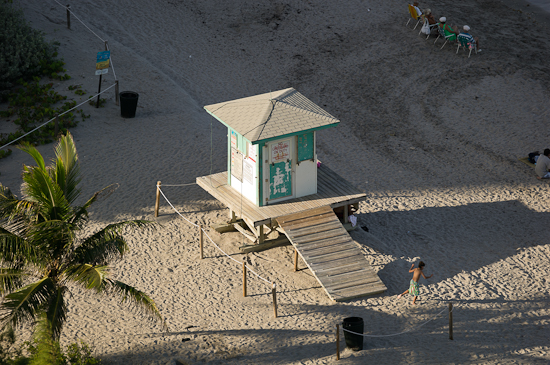
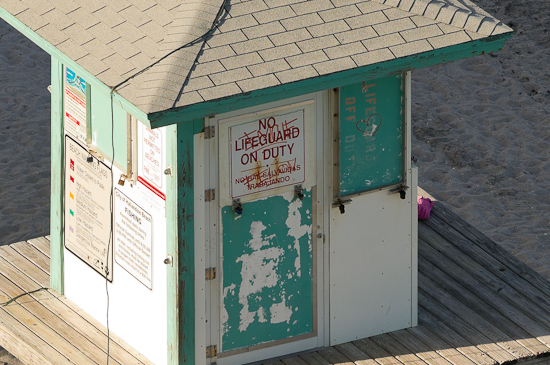
100% Crop
While Leica will inevitably introduce an incredible super telephoto lens for the S2, this solution is very effective in the interim. Of course it is not easy or inexpensive to acquire this particular telephoto lens, but thankfully there are a wide range of options to choose from. Hasselblad has made a number of 350mm lenses, and using Pentax 67 and Mamiya 645 adapters will allow you to choose from lenses like the Pentax 400mm f/4.0 ED-IF and the Mamiya 300mm f/4.5 APO. -
Leica Store wrote a new post, Leica S-Adapters for third-party lenses now official 13 years, 4 months ago
As we reported last week, Leica is preparing to ship adapters to mount third-party lenses on the Leica S2.Here are the details of the press release:
Leica Camera is pleased to introduce more accessories […]
-
Leica Store wrote a new post, Welcome to Red Dot Forum – First time visitors please read 13 years, 4 months ago
We created Red Dot Forum as a home for Leica S2 and M shooters to share information and images, learn more about their systems, receive support and build relationships with fellow Leica enthusiasts. Our goal is to […]
-
Leica Store wrote a new post, Leica S2 alternative lens adapters coming soon 13 years, 4 months ago
-
Leica Store wrote a new post, New Leica video showing how lenses are made 13 years, 4 months ago
-
Leica Store wrote a new post, Leica S2 as a vacation point and shoot? 13 years, 5 months ago
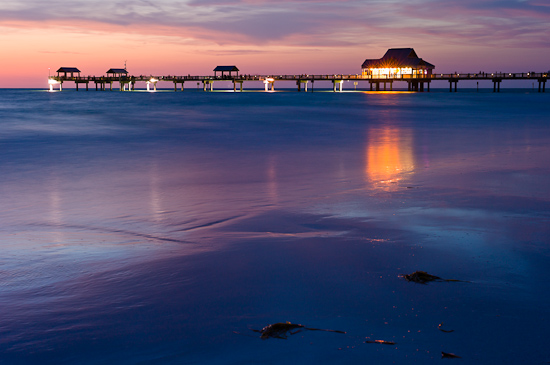
Over Memorial Day Weekend, we took a mini family vacation to Clearwater Beach, on the west coast of Florida. Many people take pictures when they travel. For me, I travel to take pictures…usually. This trip was a little different. Our plan was to just relax on the beach and sit by the pool. No hustle and bustle. No having to even think about going anywhere.Truthfully, the change was a welcome one and we all had a very relaxing time.
On the photography front, I would normally take an M9 and 50 Lux combo for this kind of outing – something small and flexible enough to take what I figured would be mostly family pictures. But as I was packing, I began to wonder if maybe I should leave the M9 at home and take an S2. Seemed like a bit of overkill for family photos. But, was it really?
I reasoned that an S2 with just the 70mm would be just as easy to carry as an M9 and a lens. And because we'd be around the water and sand, I figured that the weather-sealed S2 would be a better choice. Besides, the S2 has auto focus that might give me better odds capturing my four year old on the go. The final determining factor was that this trip would call for almost all daytime shooting in good light. I wouldn't need the low-light capabilities of an M9 with a fast Lux lens. Although, for what I expected to be stunning sunsets, I also took a small GT2541 2-Series Gitzo tripod.
After popping in a fully charged battery and a freshly formatted 32GB CF card, I fit the camera into a Crumpler 5 Million Dollar home with all the dividers removed. Perfect fit. I didn't bother taking an extra battery, any other memory cards, not even the charger. There was no way I'd shoot enough in four days to ever justify needing any of the extra bulk. And I was supposed to be lounging on the beach not on a photo expedition.
My wife took the D-Lux 5 as her weapon of choice, although my daughter Sophia ended up using it the most. Yes, I'm serious and she's actually getting pretty good. After the trip she asked us for a “real” camera because she realized the limitations of her old Fisher Price one and how much better Mommy's camera was. I'm not kidding. There is no doubt that she is my daughter!
So how did it all work out? Well, as usual the S2 performed like a champ. I love this camera.
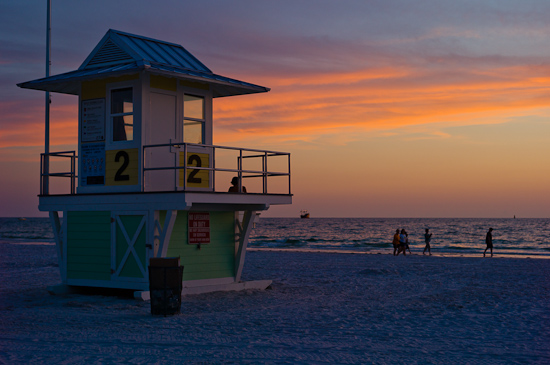
We arrived late in the afternoon on the first day and the priority was eating after being on the road for four hours. I had brought my camera bag with me to dinner, but hadn't grabbed the tripod. As we waited for the check, I could see the opportunity for a nice sunset picture quickly disappearing. We raced out of the hotel and onto the beach. I managed to get this one of the lifeguard stand, the one of Sophia looking for shells in the surf and two very low light portraits of my girls. I'm actually surprised I was able to get two for two on the portraits. 1/30th and 1/45th of a second are pretty slow speeds on the S2, and even wide-open at 640 ISO they are tack sharp.
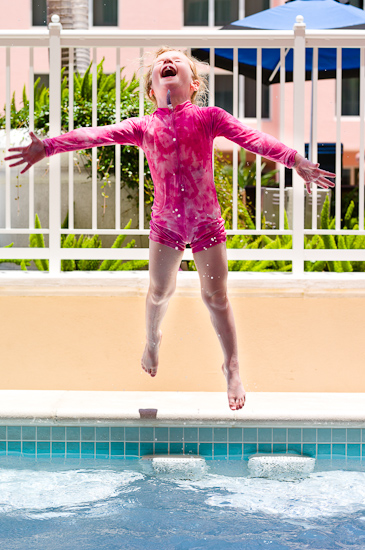
Sophia and I had a little fun together at the pool one day. She was jumping into the kiddie pool splashing and having a great time. Like any responsible parent, I encouraged her to jump some more so I could take her picture. I prefocused on her landing spot on the surface of the water, recomposed and gave her the go-ahead. This is one reason I set the rear thumb button to AF. This way, I can shoot as much as I want without the camera refocusing when I press the shutter release. Immediately after soaking me (the kiddie pool was only the size of a large hot tub and I was sitting on the other side), she waded over to see what I got. “Let me do it again! Take more pictures.” I wasn't going to argue with that, so we shot a good assortment and admired the results. I did have to take a break to wipe all the water off the lens – too many spots and chlorine leaves a hazy residue. I guess the weather-sealed camera was a good idea, after all.
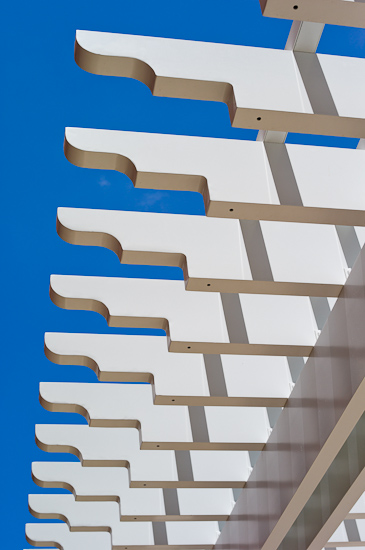
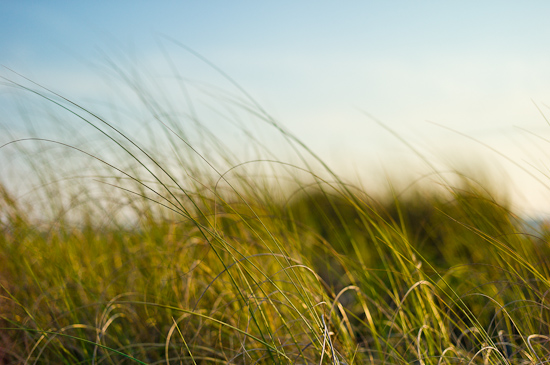
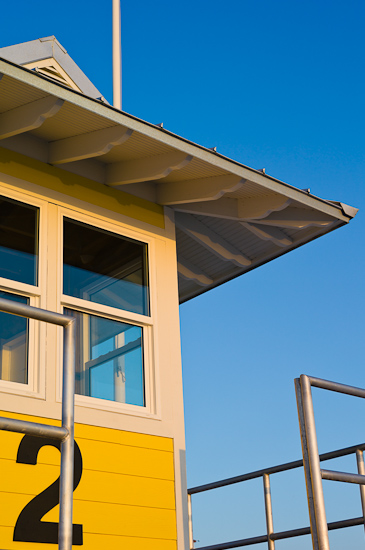
Here's another from the pool area, this time looking up. Always look up and around you to find different angles. Admittedly, I saw this trellis from my lounge chair while sipping a Mojito. Hey, I was on vacation.The following day's sunset was much more productive thanks to some advance planning (not much, admittedly). Ah, what a difference a tripod makes. I wandered through the dunes and tried my hand at some shallow DOF shots of the reeds. And as I came down from the dunes, I saw that the afternoon light was just gorgeous on the yellow lifeguard stand against the blue sky to the East.
As the sun was going down, people were packing up their beach toys and coolers, and a few like this family were getting in one last swim for the day. I really like this shot with the abandoned sandcastle in the foreground and the slightly out-of-focus background.
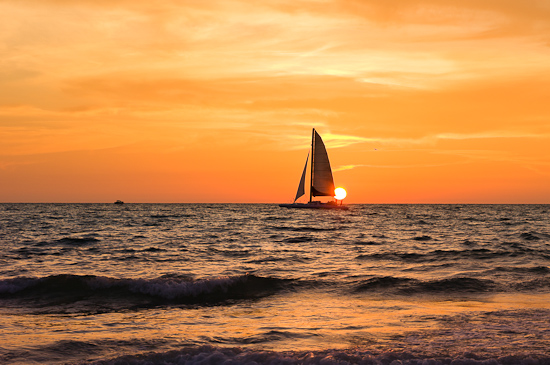
I set up my tripod and was thinking about coming up with something a little more interesting as sunset rapidly approached. A large sailboat was making its way across the horizon and I saw my opportunity. After taking a couple test shots to make sure my exposure was on, I waited for the boat to fill my composition. The boat was moving at a pretty good pace so I knew I only had one shot, literally. Truth be told, I think I waited a split second too long and missed the exact moment I was hoping for, but in review I am actually very happy with the result. This shot would also have been better with the 180mm, but again, I am satisfied. I did do a little cropping on the final image. One of the best things about having 37.5MP is that even cutting the resolution in half, I could still make a great 20×30 if I wanted to.
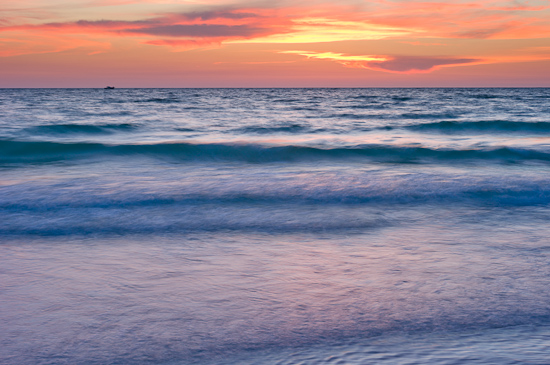
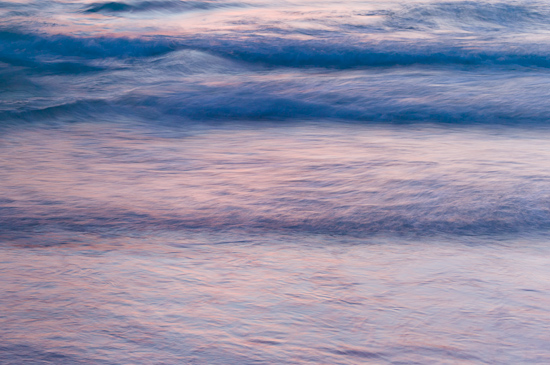
I actually prefer the time just after sunset to the actual sunset. The colors are just so amazing and only enhanced by longer exposures. I experimented a bit with showing motion and softening the surf. The second shot is actually a crop of a wider shot, again with plenty of resolution remaining. With a 120 or 180, it would have been perfect full-frame.Shooting at sunset, once the light is gone and darkness sets in, most people pack up and head home. Well, they are missing some of the most magical conditions for photography. I experimented with a range of shutter speeds from 4 sec to 32 sec, with my favorite being this one here at 24 sec. Some non-photographers passing by on the beach saw the image on my LCD and asked with wonder how the picture looks like daylight (his words, not mine) when it was almost totally dark. I tried to explain long exposure, but he settled on the fact that I must have a really good camera. Oh well.
On our final day before heading back, we hit the beach again. The weather was just perfect with the sun shining and the clouds at bay. Sophia got all pinked up and got down to the business of sand castle building.
When all was said and done, the S2 was the absolutely perfect choice for this kind of shooting. I didn't stress out when the camera was covered in sand (blew it off with compressed air when I got home) or when splashed by sea water or pool water. Once you get accustomed to using the S2 it's really hard to use anything else, even when most people would just use a point and shoot. But, hey, I'm not most people and I ended up with some really print-worthy shots on an outing where I figured I'd just be laying by the pool.
Tech notes: All images were processed from Compressed DNG to JPG in Adobe Lightroom 3.4.1. No other edits were done outside of Lightroom. -
Leica Store wrote a new post, Leica M8 Firmware Update Version 2.014 13 years, 5 months ago
-
Leica Store wrote a new post, Leica Super-Elmar-M 21mm f/3.4 ASPH Announced 13 years, 5 months ago
In addition to announcing the M9-P today, Leica is also releasing a new wide angle M lens. In the same spirit as the 18mm Super-Elmar and 24mm Elmar, the Super-Elmar-M 21mm f/3.4 ASPH lens is designed for […]
-
Leica Store wrote a new post, Leica M9-P Officially Announced 13 years, 5 months ago
-
Leica Store wrote a new post, Leica M9 Firmware Update Version 1.162 13 years, 5 months ago
-
Leica Store wrote a new post, Leica S2 Photo Adventure: New England Fall Foliage 13 years, 5 months ago
Join Dale Photo & Digital and Leica Camera, Inc. for a photographic adventure through New Hampshire and Vermont. Over the course of the one-week trip, you will have the opportunity to photograph a wide […]
-
Leica Store wrote a new post, New Leica X1 v2.0 Firmware Released 13 years, 8 months ago
-
Leica Store wrote a new post, Sophia's Choice 13 years, 11 months ago
A few days ago, my almost-4-year-old daughter Sophia did something for the very first time: she asked me to take her picture.
For me this was a pretty big deal. Up until now, I've had to convince her to let me take her picture. But this was different. She dressed herself up in one of her ballet outfits, blinged it up with a tiara, necklace and pink sparkly Chuck Taylor All Stars, grabbed her doll Angel and marched up to me. She insisted that I take her picture. “Daddy,” she started, “I want you to take your camera out of your bag and take a picture of Angel and me.” So, I did. I grabbed my M9 and 50 Lux while Sophia sat herself down on the couch and smiled. She rarely smiles in pictures and almost never looks at the camera. Here, she did both. I think she might have even asked me what was taking so long as I got on my knees and focused.
I don't think my picture of her will win me any prizes, but the significance of her request to be photographed makes it important and special for me. And, almost immediately after snapping the shot, she jumped down off the couch and raced to see her likeness on the LCD. “I love it, Daddy!!” We shared a little moment, then she was off to play a different game. And that was that.
Just thought I'd share the experience.
- Load More




























The Pentax IR Focus index is close to F8. This is usually a good indicator of how much CA a lens will have in the visible band. Pentax made a series of “Ultra-Achromatic” in M42 mount lenses that were corrected from UV to IR bands. They do not have CA problems. I'm not sure if these were made for the larger format cameras. Corrected for inflation, they cost as much as the APO Summicron 50/2.
Gabriel,
I'm not so sure I agree. Yes, a good quality print from a 6×7 original should be very nice indeed. But, I've seen prints from the S System at 5 feet across that are just stunning with incredible amounts of detail. It would be an interesting experiment for sure.