Today, Leica has issued a firmware update for the Leica Q. This update offers an extensive list of improvements and additions, including a revision of the menu layout, a new power saving mode, additional custom function options, enhanced profile management, faster DNG write speeds, further OIS and electronic shutter controls, and more. Keep reading for a full breakdown and step-by-step instructions on updating your camera.
This comprehensive update for the Q now brings many features and UI standards from newer cameras like the CL to the Q. It's great to see Leica stepping up their firmware game to create a unified customer experience across all system cameras. On one hand, this makes switching between different systems easier, and on the other, brings additional functionality from more recent designs. On both fronts, Leica should be commended for continuing to keep all cameras up to date.
You can download the firmware here:
Improvements in firmware version 3.0
Menu Structure Adaptation
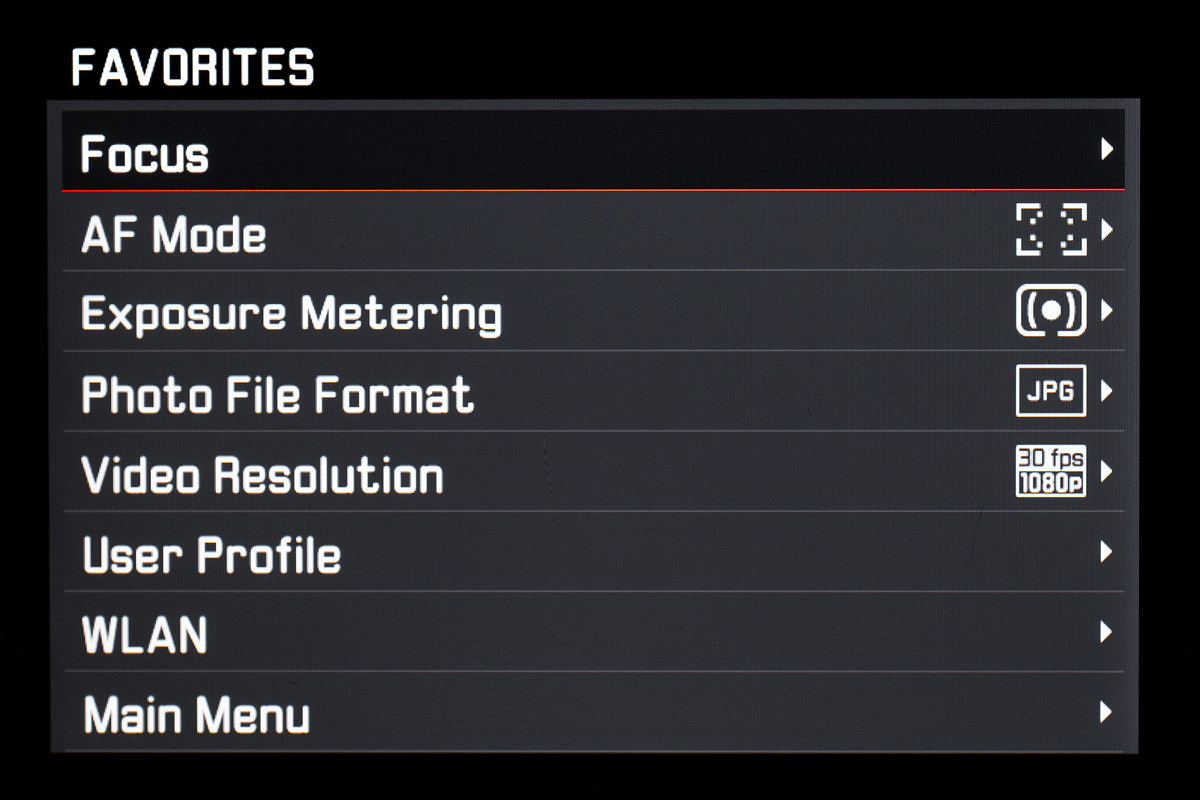
In order to give the customer direct access to their preferred settings, FAVORITES was added to the MENU, customizable up to 15 settings. We first saw the Favorites menu on the Leica SL, and has since found its way onto the M10, TL2 and CL. It's totally configurable and puts your most used menu options in one quickly accessed location.
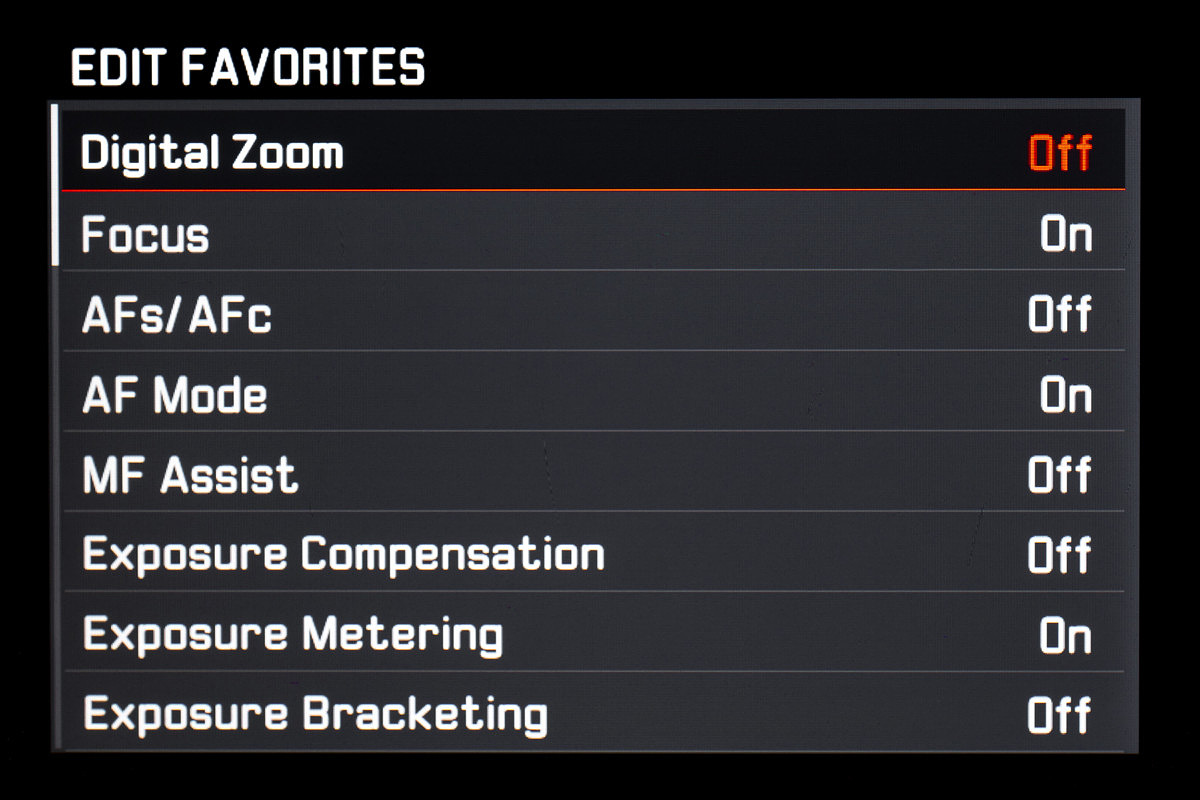
You can customize your Favorites menu by going into the Customize Control menu and selecting Edit Favorites. Here, just enable options you'd like to display in the Favorites menu, up to a maximum of 15. Conversely, rarely used options can be hidden by setting their property to Off.
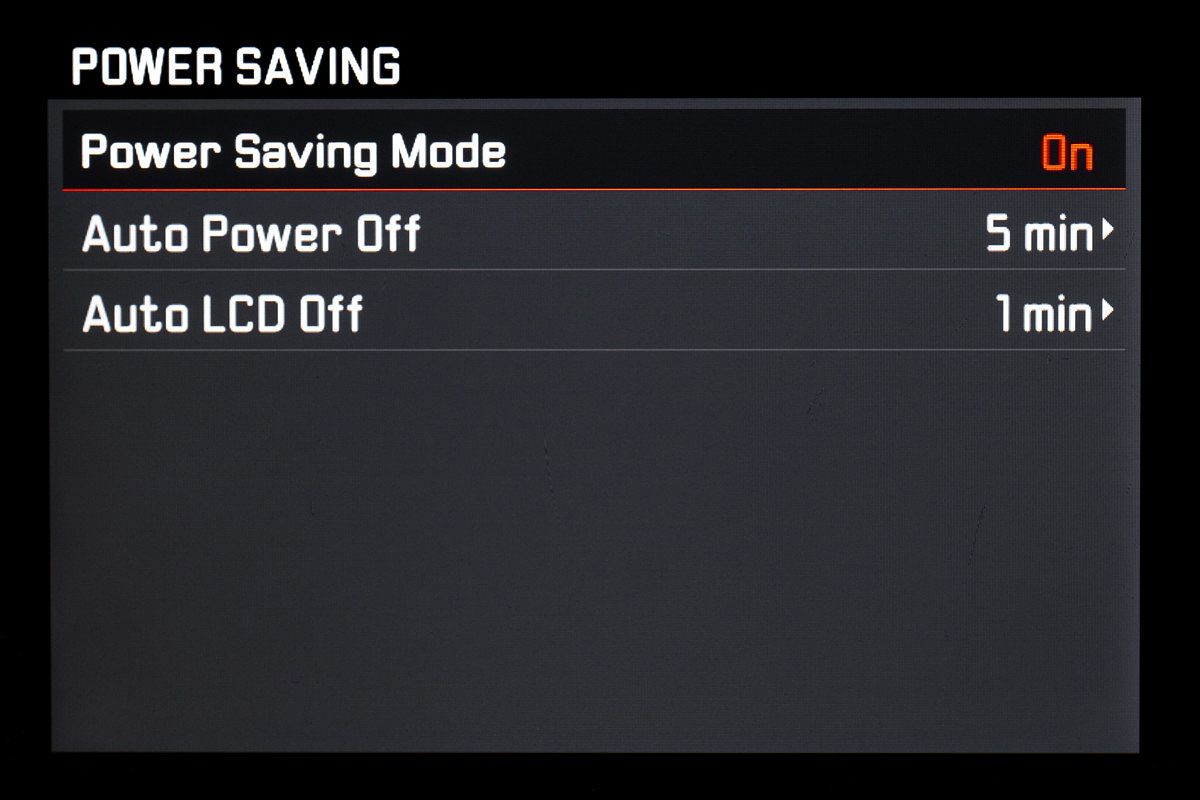
New Menu Item : Power Saving Mode
The camera automatically goes to Auto Power Off after 10 seconds. This setting overrides the Auto Power Off time. It's a bit aggressive for our tastes, but should certainly lead to longer battery life.
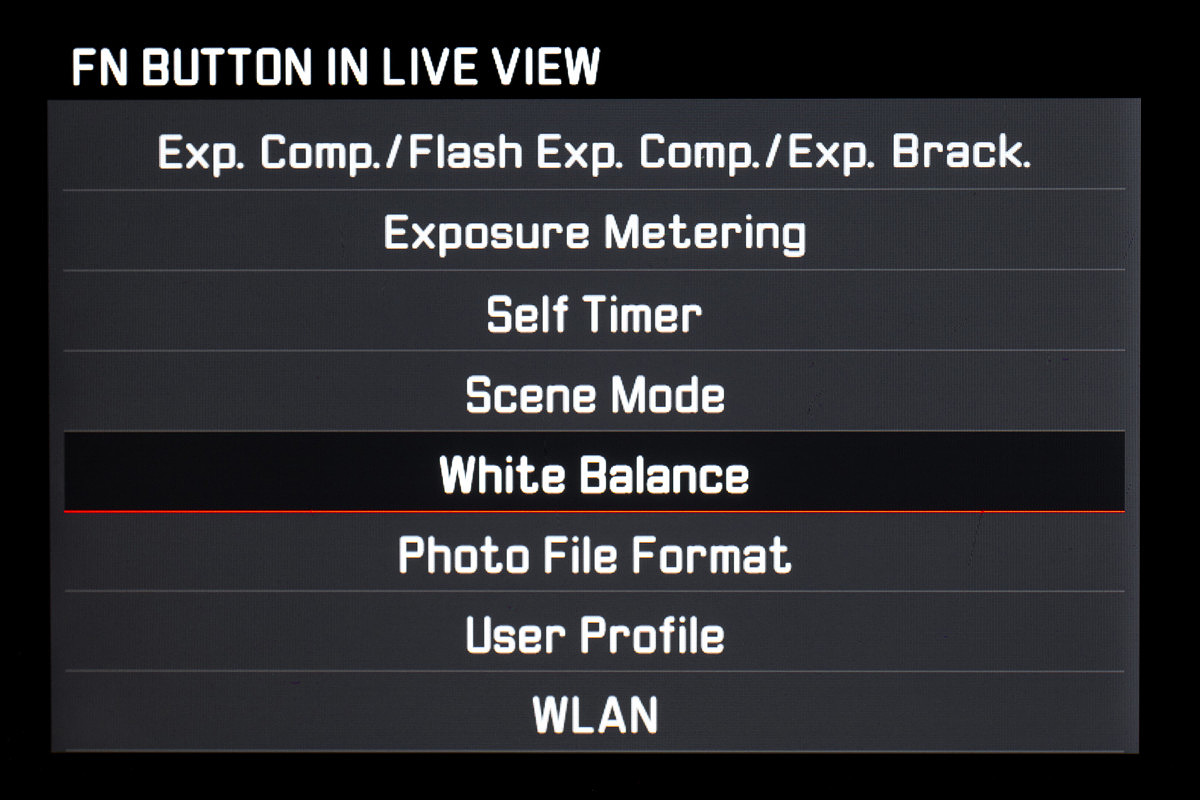
New Menu Item : More options for the FN Button
You can now assign even more functions to the FN button. This can also be accessed in the Customer Control menu under the FN Button sub-menu.
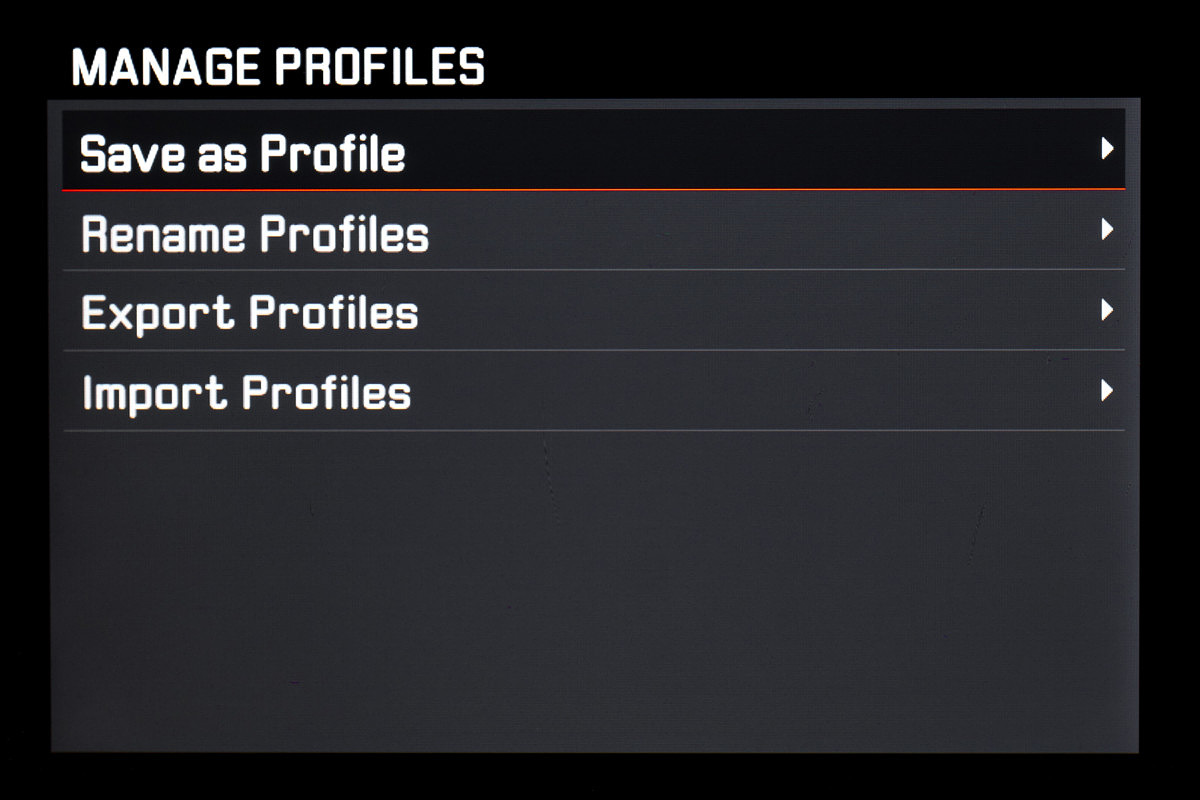
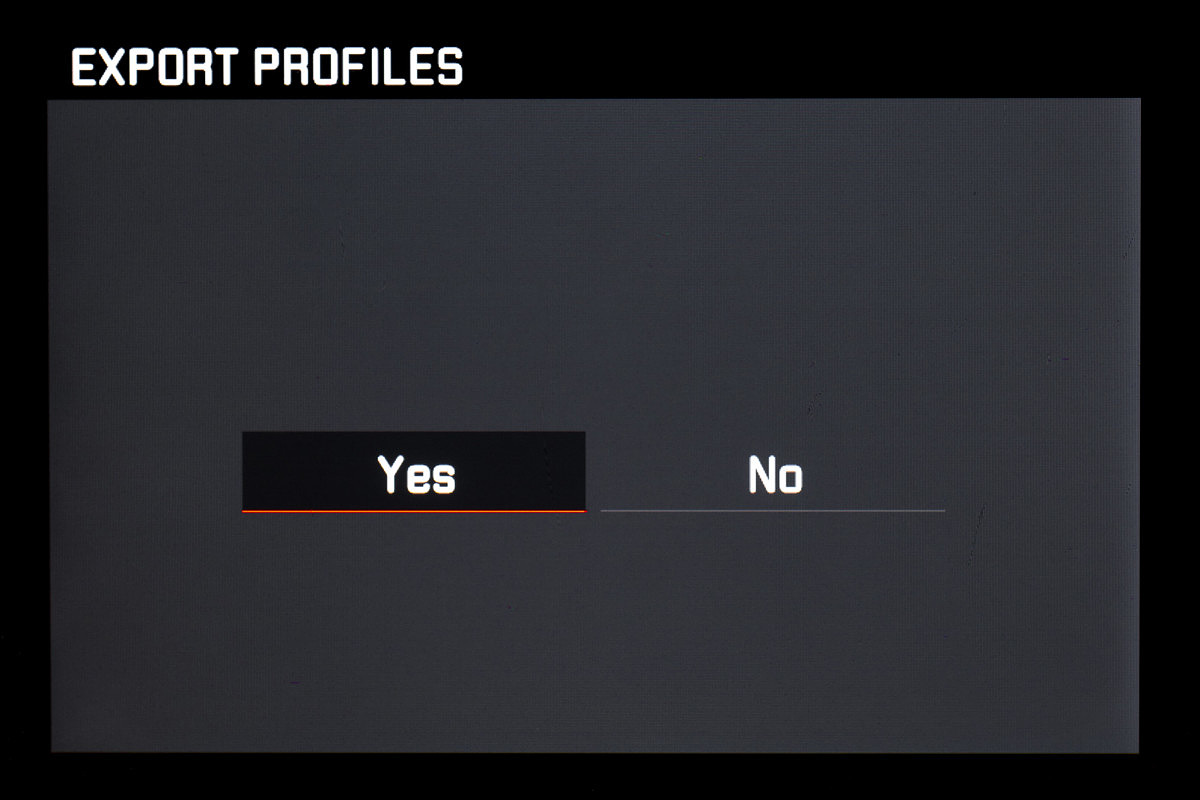
New Menu Item : Manage your profiles
Import and export of user profiles to SD card now possible. This is a great way to synchronize settings between multiple cameras, or a good way to backup your settings in case you loan out your camera to a friend or family member and want an easy way to reset back to your setup. To access, head to the User Profile menu and select Manage Profiles.
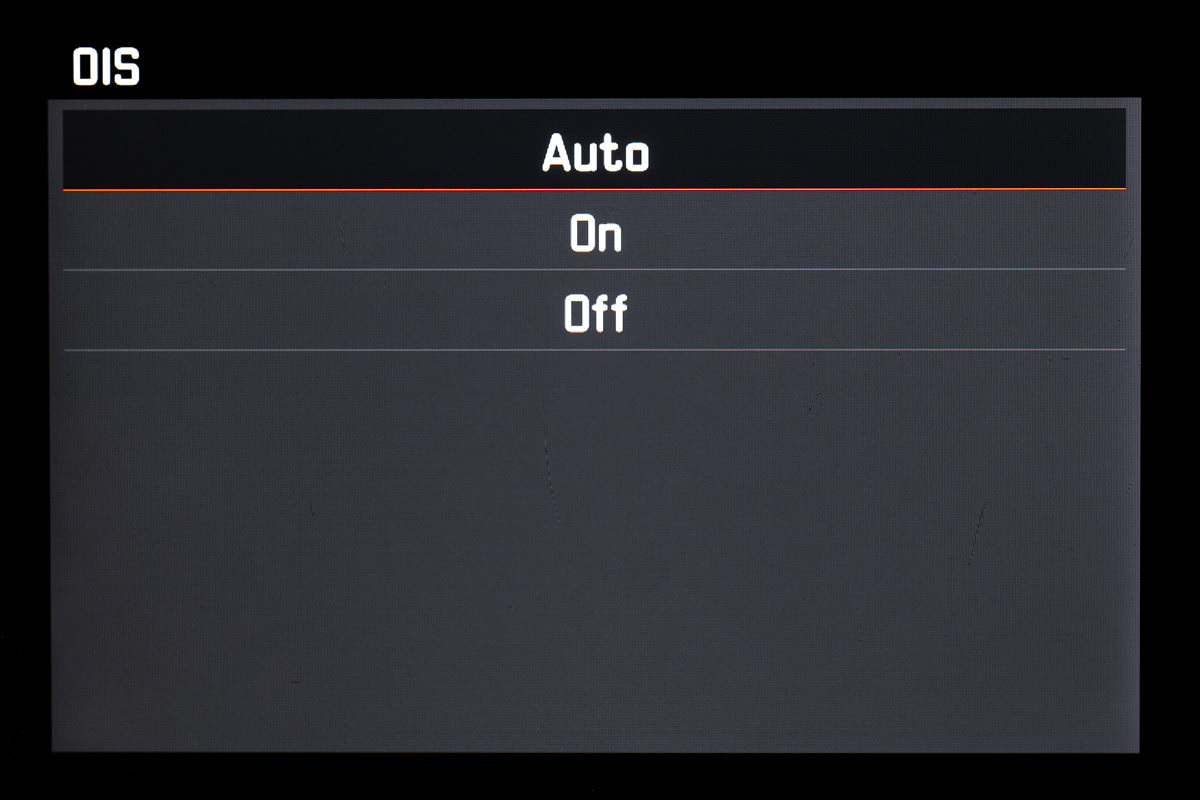
New Menu Item : OIS “Auto” setting added
By activating this option, depending on the shutter speed, OIS (optical image stabilization) will be automatically activated up for speeds up to 1/60th of a second.
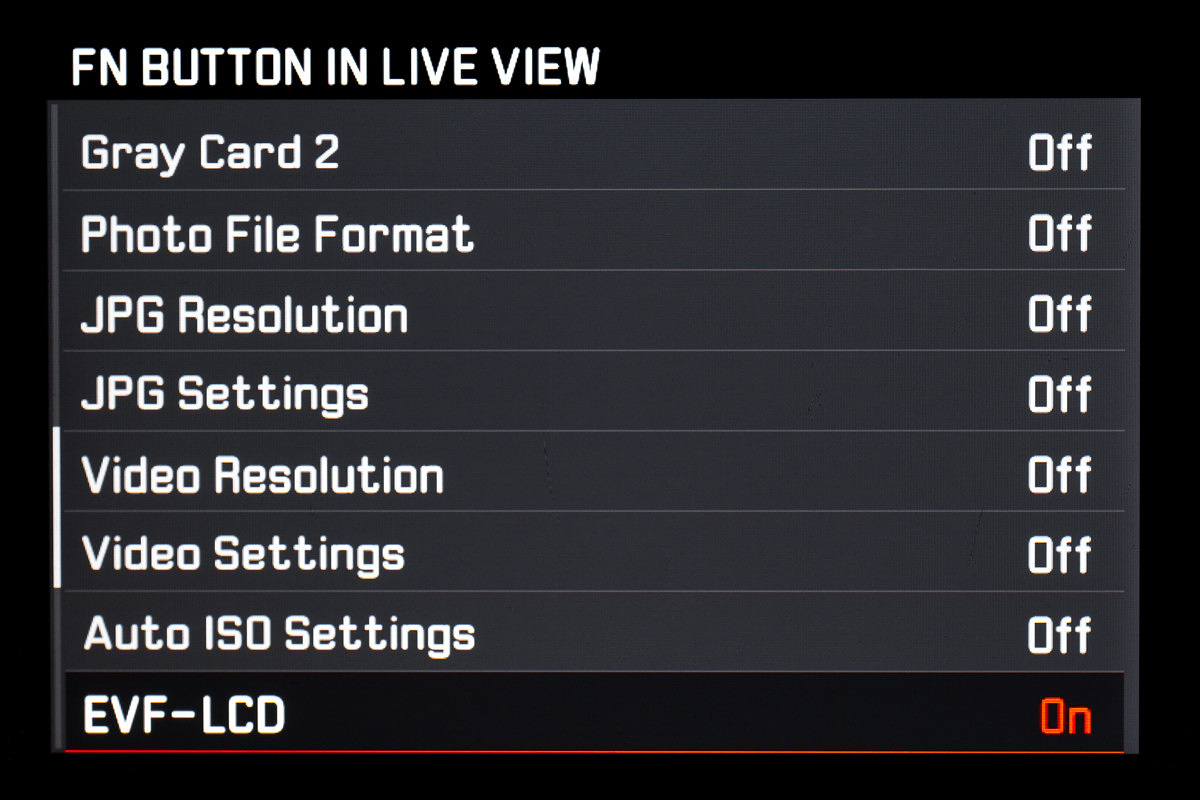
New Menu Item : Assignment of EVF / LCD
EVF / LCD menu can now be assigned to the FN button via customize control. The Q lacks a dedicated EFV toggle button like the SL. By assigning the FN button to EVF-LCD, you can cycle through EVF/LCD/Auto EVF without going into the menu.
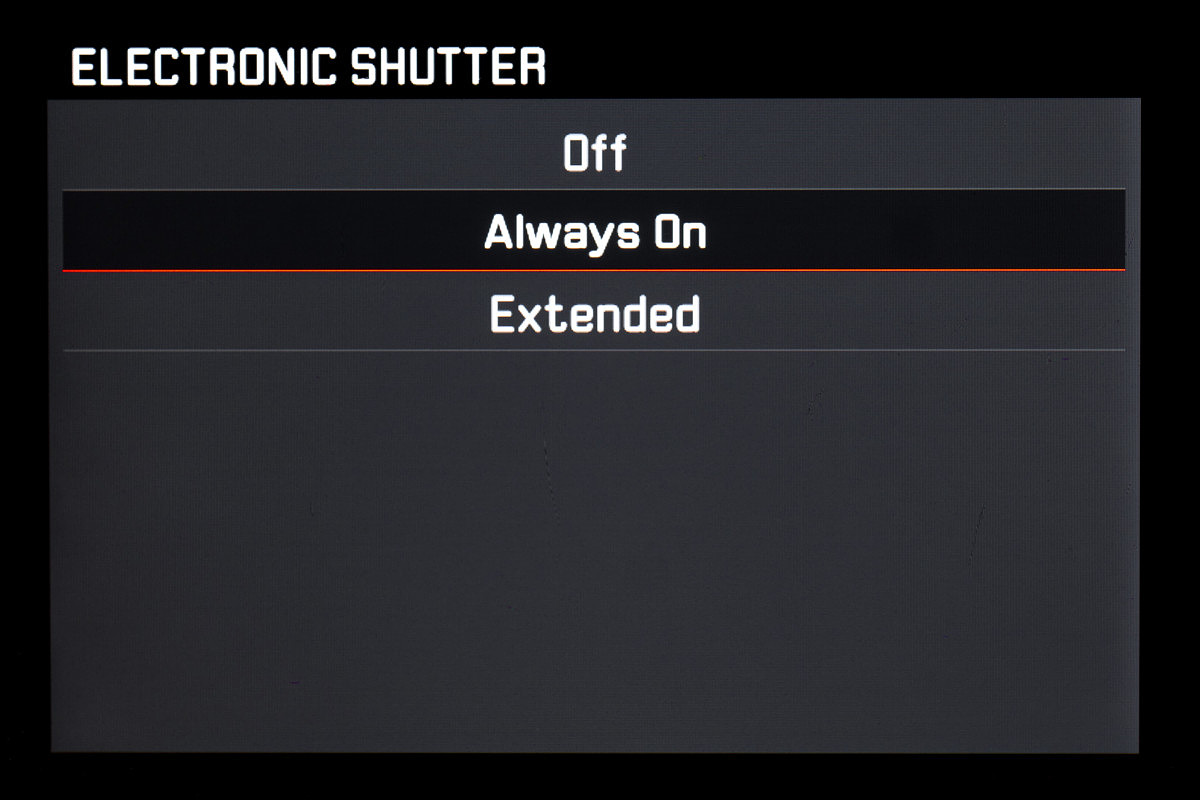
New Menu Item : Additional electronic shutter mode
Always On has been added to the electronic shutter menu. This is an extremely useful feature found in the SL and CL, where the camera forgoes the mechanical shutter at all shutter speeds. By doing so, the Q becomes silent, perfect for discreetly photographing live performances, events like weddings, or even in a music recording studio during a session.
Do be aware though, that electronic shutter is not ideal for quickly moving subjects. Resulting images could suffer from the rolling shutter effect. For static or slow-moving subjects, though, the E-shutter should yield perfect results.
Faster : Creating DNG files in the camera
Processing speed of DNG files has been optimized. While we don't think anyone thought the Q was slow recording images, we'll take any speed improvements Leica is offering.
AF position is kept after the camera has been switched off and on again
Instead of resetting the AF point after a power cycle, it now returns to the same position.
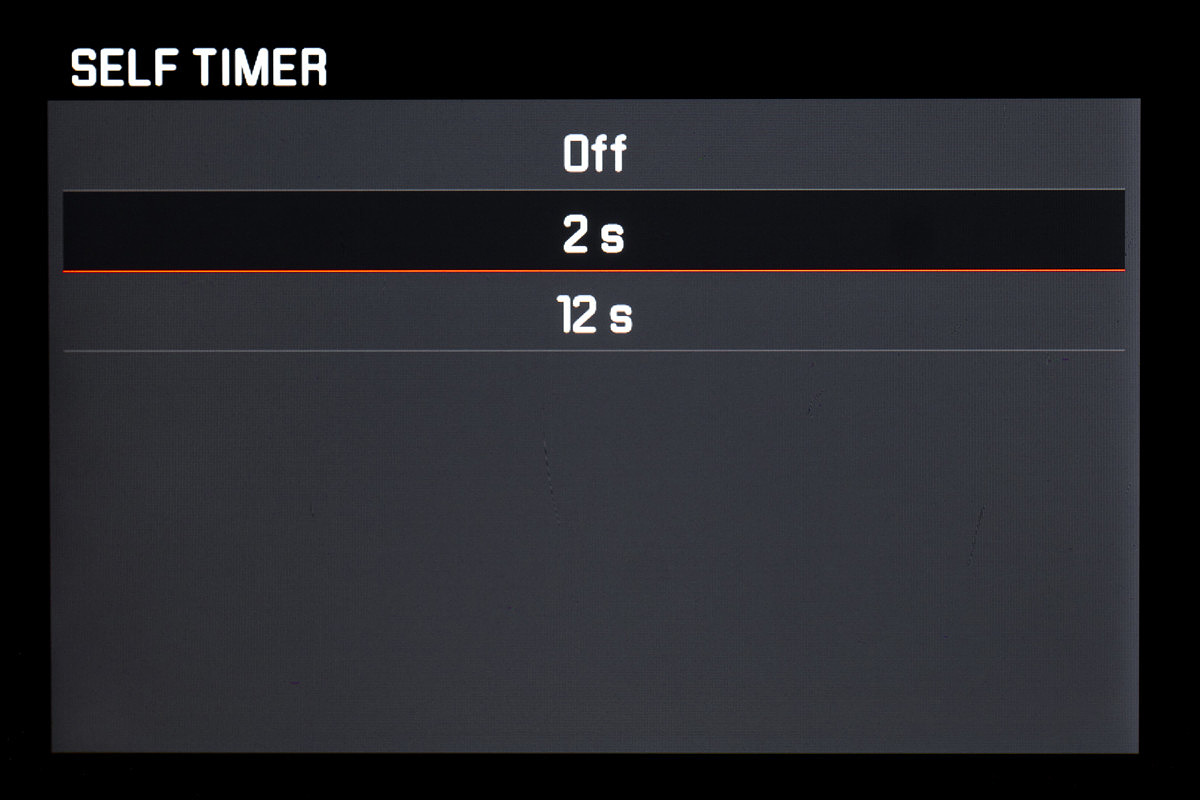
Self-timer setting is kept after the camera has been switched off and on again
Similar to the AF point staying fixed between power cycles, the self-timer now retains its setting. Just be sure to remember to disable self timer before putting the camera away, or you might find yourself wondering why the shutter release is so delayed when you go to take the next shot.
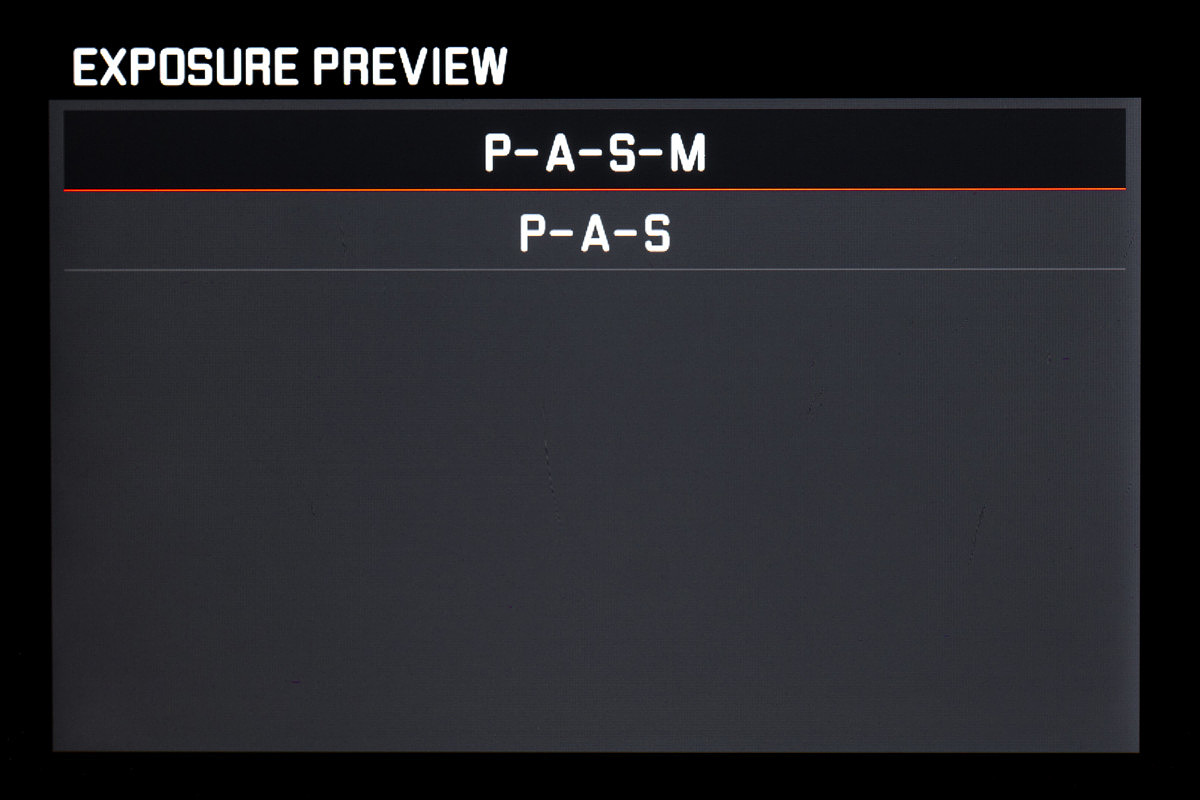
Additional Exposure Preview mode implemented
Using a flash unit and/or in dark environments, Exposure Preview can be deactivated in M mode. This feature has been sorely lacking on the Q for some time. Nice to see this added.
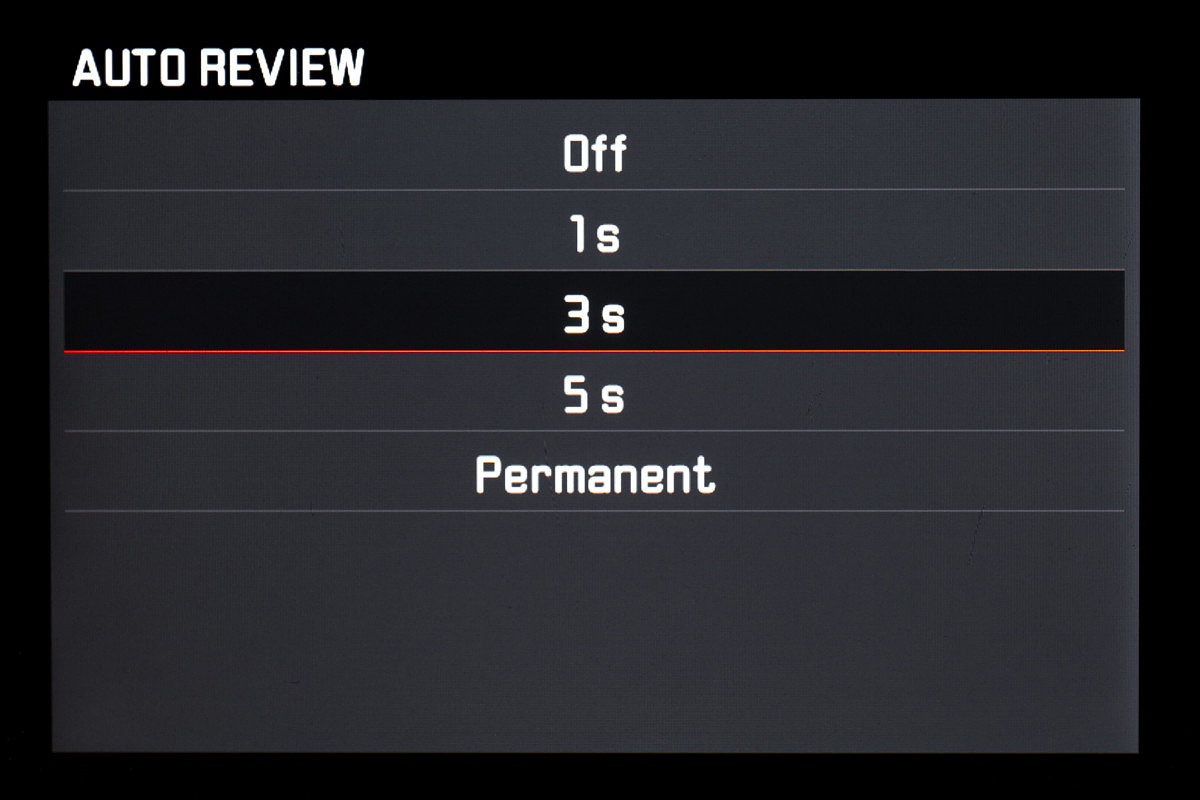
Additional function in Auto Review mode
Right after image capture Auto Review will be active as long as the release button is kept pressed. Interesting that there is no menu option for Duration, which is basically what this functionality is usually called. Instead, you can always override the auto review time. Once released, the normal time is obeyed.
Step-by-step video
We made a handy step-by-step video on how to update your Leica Q firmware.
To update your Q Firmware, follow these instructions:
- Insert a fully charged battery into your Q.
- Insert an SD card into your Q, one that you can format (which means everything on the card will be erased).
- Format the SD memory card in the Q.
- Remove the SD card from the Q and insert it into an SD card reader attached (or built-in) to your computer.
- Download the Leica Q firmware version 1.1.
- Copy the firmware file Q116_30.quf directly onto the SD card. You don’t want to put the file into any folders on the card, but in the “root directory” of the card.
- Once the copying is complete, properly eject the SD card from your computer and insert it into your Q with the camera turned off.
- While holding down the red video button on the top of the camera, turn on the Q.
- You will be prompted with a firmware update screen. Press OK.
- The Q will begin the firmware update process, which should take about 90 seconds.
- Once the firmware update is complete, turn off and turn on your camera. You’re done!
It’s important to note that during the update process, you should NOT:
- Turn off the camera
- Touch any buttons on the camera
- Remove the battery
- Remove the SD card

David –
Suggest you inform Leica immediately that their published Leica Q firmware 3.0 upgrade instructions are careless and WRONG.
Successful Leica Q upgrade requires both that the upgrade file be located in a root directory of the SD card AND and that red movie button be held down when turning on the camera.
After wasting a hour messing with multiple SD cards using Leica’s incomplete instructions, I succeeded eventually only because Luis Mora shows in his video exactly how to successfully upgrade Leica Q firmware.
What Luis Mora includes that Leica misses is the need to hold down the red movie button while turning on the camera.
Leica firmware update instructions
6. Insert the card into the camera.
7. Switch the camera on while keeping the video record button pressed. ?
8. Press YES to start the update process.
Nice to finally get an update for the Q!
On the other hand this kills my hope for a new Q model in the veery near future…
I have not found a way to set the FN button to Exposure Comp and keep it there. The camera always defaults to AWB which I never want to change.
I also have not found a way to set User Profiles that stay the way I set them.
Very frustrating !!!
Richard, I cannot seem to duplicate the issue on the Q I have here with firmware 3.0 installed. If I press and hold the FN button then select Exp. Comp as the function I want, the button stays that way unless I reset the camera to factory default, or select “Default Profile” from the User Profile menu (which is basically the same as resetting the camera). Feel free to give us a call this week and we are happy to help at 305-921-4433 or email me at josh@leicastoremiami.com
help. nothing happening when holding red film button down. camera just turns on. I’m still on 1.1 firmware
I just bought the Q-P and was having a hard time trying to connect the wifi-app in the phone/leica and you saved my life with this detailed update info! THANK YOU! It just needed the newest firmware! Thanks thanks!